現在のSphinxを仮想環境へ導入する
py -m venv .venv
.venv\Scripts\activate
python -m pip install --upgrade pip sphinx
sphinx-quickstart docs
sphinx-build -M html docs/source docs/buildWindowsではpyランチャーが使えない場合、pythonへ読み替えます。プロジェクトごとに仮想環境とrequirements.txtを用意し、テーマや拡張機能のバージョンを固定すると再現しやすくなります。
この後のSphinx 3.0.4、Anaconda Navigator、旧テーマの画面は当時の実例です。基本的なreStructuredText記法は参考にできますが、設定項目はSphinx公式ドキュメントで確認してください。
プロジェクトのドキュメント作成を何で作るべきか色々考えていたのですが、前から気になっていたSphinxを一度使って見たのでインストール手順から使用感まで紹介したいと思います。 Sphinxの記法もすぐ忘れてしまいそうなので、よく使う章・テーブル・文字装飾などを中心に備忘録的にまとめます。Sphinxのインストール
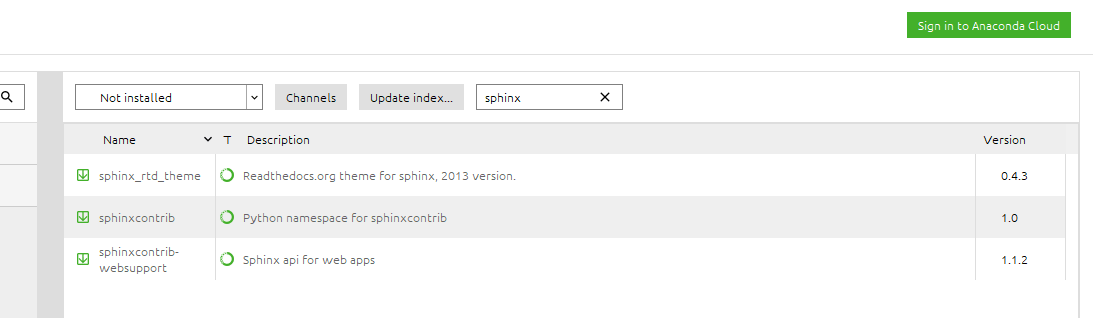 Sphinxのインストールは環境ごとに色々違いがあると思いますが、今回はWindows端末にAnaconda Navigatorで生成した仮想環境にインストールします。
linuxやmacでもPythonが動作する環境であれば使用可能です。今回はAnaconda Navigatorで既に仮想環境の構築や、Pythonの設定が済んだうえでの流れとなります。
インストール自体はAnaconda Navigatorを使用する場合はGUIでインストールするだけです。以下画像の通りですので説明は省略します。
Sphinxのインストールは環境ごとに色々違いがあると思いますが、今回はWindows端末にAnaconda Navigatorで生成した仮想環境にインストールします。
linuxやmacでもPythonが動作する環境であれば使用可能です。今回はAnaconda Navigatorで既に仮想環境の構築や、Pythonの設定が済んだうえでの流れとなります。
インストール自体はAnaconda Navigatorを使用する場合はGUIでインストールするだけです。以下画像の通りですので説明は省略します。
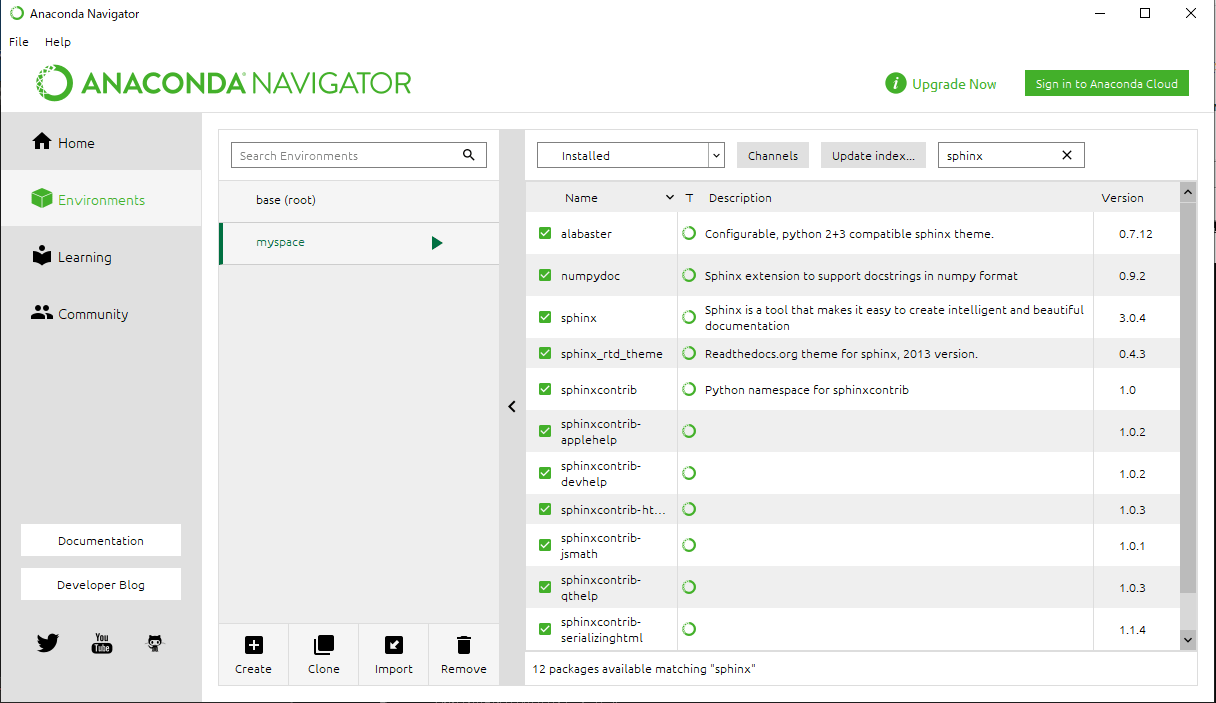
Sphinxのバージョン確認
Sphinxのインストールが出来ましたら、ターミナルから以下のコマンドでバージョン確認してみます。(Anaconda Navigator上からも確認は出来ます) 2020/06時点では最新が3.0.4でした。(myspace) C:\Users\hogehoge>sphinx-quickstart --version
sphinx-quickstart 3.0.4Sphinxのプロジェクト生成
まずは、プロジェクトを生成する任意ディレクトリへ移動します。 (例)cd C:\project_dir\docSphinxのプロジェクト生成
sphinx-quickstartコマンドでプロジェクトを作成する事が出来ます。sphinx-quickstartはパラメータを指定してプロジェクトを自動生成するパターンと対話式で生成するパターンがあります。 (どちらも結局指定する内容は同じです。) 設定が必要となる項目は以下の通りです。- Project name:任意のプロジェクト名
- Author name:任意の管理者名
- Project release:任意のリリース番号
- Project language:ja
(myspace) C:\project_dir\doc>sphinx-quickstart
Welcome to the Sphinx 3.0.4 quickstart utility.

Please enter values for the following settings (just press Enter to
accept a default value, if one is given in brackets).

Selected root path: .

You have two options for placing the build directory for Sphinx output.
Either, you use a directory "_build" within the root path, or you separate
"source" and "build" directories within the root path.
> Separate source and build directories (y/n) [n]: y

The project name will occur in several places in the built documentation.
> Project name: project_name
> Author name(s): author_san
> Project release []: 1.0

If the documents are to be written in a language other than English,
you can select a language here by its language code. Sphinx will then
translate text that it generates into that language.

For a list of supported codes, see
https://www.sphinx-doc.org/en/master/usage/configuration.html#confval-language.
> Project language [en]: ja

Creating file .\source\conf.py.
Creating file .\source\index.rst.
Creating file .\Makefile.
Creating file .\make.bat.

Finished: An initial directory structure has been created.

You should now populate your master file .\source\index.rst and create other documentation
source files. Use the Makefile to build the docs, like so:
   make builder
where "builder" is one of the supported builders, e.g. html, latex or linkcheck.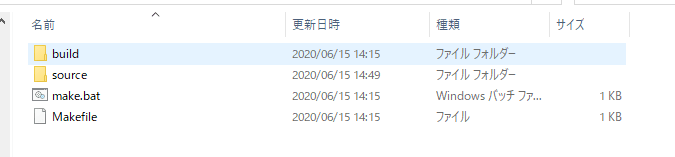 今回設定した内容は、 ./source/conf.py に反映されていますので、作成後にプロジェクト名などを変更したい場合はこちらを編集します。
Sphinxの使い方 サンプルコード
記載内容はプロジェクトによって異なると思いますが、以下は割と共通的に conf.py で設定しておいた方が良さそうな記載。サイドバーのソースコードを表示 を消す
html_show_sourcelink = Falseフッターのコピーライトを消す
html_show_copyright = Falseフッターの「このドキュメントはSphinxで作成しました」を消す
html_show_sphinx = False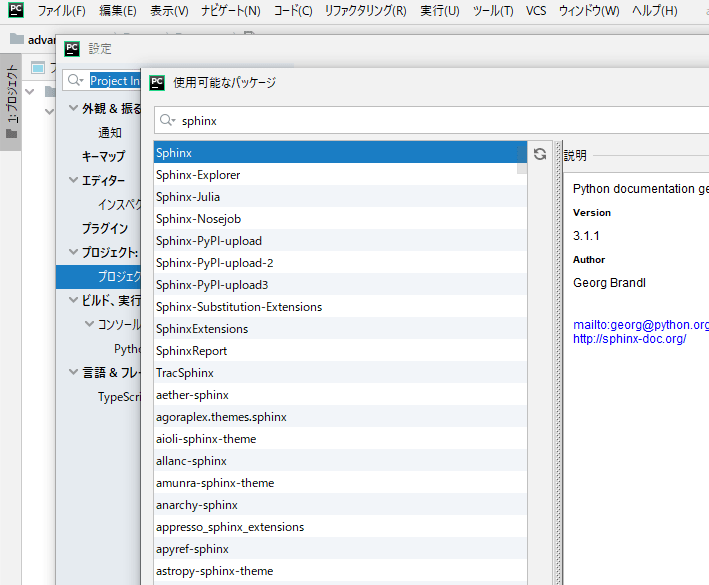
ページ追加
./source/index.rst と同様に、任意の hogehoge.rst を追加します。ページごとの内部リンクは後述のハイパーリンクで繋ぎます。 Sphinxの記法は膨大で全てを記載するのは難しいので、ここではよく使う代表的な記法をいくつかご紹介します。より細かい使い方については以下より本家のリファレンスをご覧下さい。
Sphinxドキュメント — Sphinx documentation
www.sphinx-doc.org
章・番号表示
.. toctree::
   :maxdepth: 2
   :numbered:
   :caption: caption text
   :name: name text
   :titlesonly:
   :glob:
   :hidden:
   :includehidden:

ファイル名コードのシンタックスハイライト
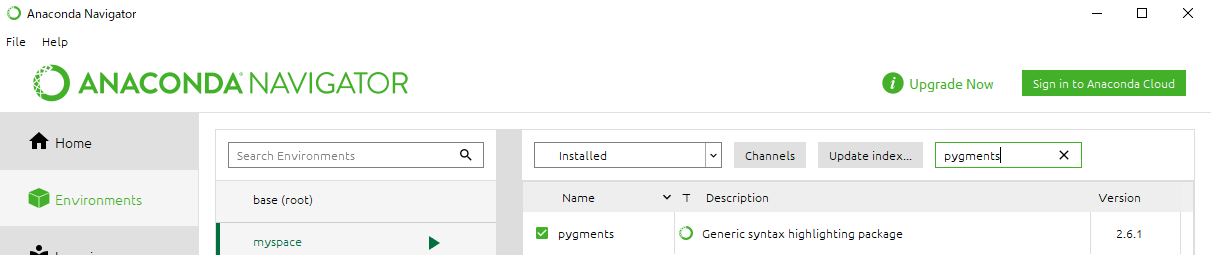
.. code-block:: python

   def some_function():
print 'abcde'見出し・セクション
=====================
見出し(特大見出し)
=====================

大見出し
========

中見出し
--------

小見出し
^^^^^^^^
テーブル表示1
+------------+------------+-----------+
| Header 1   | Header 2   | Header 3  |
+============+============+===========+
| body row 1 | column 2   | column 3  |
+------------+------------+-----------+
| body row 2 | Cells may span columns.|
+------------+------------+-----------+
| body row 3 | Cells may  | - Cells   |
+------------+ span rows. | - contain |
| body row 4 |            | - blocks. |
+------------+------------+-----------+テーブル表示2
=====  =====  ======
   Inputs     Output
------------  ------
  A      B    A or B
=====  =====  ======
False  False  False
True   False  True
False  True   True
True   True   True
===== ===== ======テーブル表示3
.. csv-table::
   :header: A, B, A and B
   :widths: 5, 5, 5

   False, False, False
   True, False, False
   False, True, False
True, True, Trueハイパーリンク
`anchor_text <target_URL>`_画像挿入
.. image:: ../img/hogehoge.png
   :height: 150px
   :scale: 110%
   :target: https://advanceffort.com
画像
図にキャプションをつけたい- 適用例., 画像の大きさを変えたい- 適用例., 文章の途中に画像を埋め込みたい- 適用例., 画像からリンクを貼りたい- 適用例., 図に番号を自動で振り、参照したい- Sphinx 1.3以降, Sphin […]

sphinx-users.jp
CSSによる文字色・サイズ・強調などのhtml用装飾
スタイルシートを利用して文字装飾なども可能です。(LaTexによるPDF出力では反映されませんでした) ./source/_static/ 以下に任意のcssファイルを作成して、conf.pyで読み込みます。(ここではbase.cssとします。) ■conf.pydef setup(app):
app.add_css_file('base.css').red {
color:red;
}.. role:: red
文章のなかで :red:`赤い文字列` だよ強調(太字)・強い強調
*text*
**text**
注釈
.. note::

    ノートは青い枠で囲まれます

.. warning::

    ワーニングは黄色い枠で囲まれます
他のファイルをインクルードする
.. literalinclude:: hogehoge.rst
    :language: rst
    :linenos:
リスト(箇条書き)
* 項目1
+ 項目1
- 項目1番号付きリスト(箇条書き)
#. 項目1Sphinxドキュメントのテーマ変更
Sphinxでドキュメントを生成する際にhtmlのテーマを選ぶことが出来ます。htmlテーマは既存の組み込みテーマと、独自に追加したテーマも設定する事が出来ます。 既存のテーマは以下の種類があり、初期値としては、alabasterというテーマが設定されています。- alabaster
- classic
- sphinxdoc
- scrolls
- agogo
- traditional
- nature
- haiku
- pyramid
- bizstyle
bootstrapのテーマに変更
テーマは、bootstrapのテーマも設定する事が可能です。bootstrapテーマを設定する場合は、テーマをインストールしたうえで上記同様に conf.py を以下のように変更するだけです。 ■インストールpip install sphinx_bootstrap_themeimport sphinx_bootstrap_theme
html_theme = 'bootstrap'
html_theme_path = sphinx_bootstrap_theme.get_html_theme_path()ドキュメントの出力方法
html出力する場合
Sphinxで作成したドキュメントをhtml形式で出力する場合は、make html で出力出来ます。 出力先は ./build/html ディレクトリ以下に出力されます。(myspace) C:\project_dir\doc>make html
Running Sphinx v3.0.4
loading translations [jp]... not available for built-in messages
making output directory... done
building [mo]: targets for 0 po files that are out of date
building [html]: targets for 1 source files that are out of date
updating environment: [new config] 1 added, 0 changed, 0 removed
reading sources... [100%] index
looking for now-outdated files... none found
pickling environment... done
checking consistency... done
preparing documents... done
writing output... [100%] index
generating indices... genindexdone
writing additional pages... searchdone
copying static files... ... done
copying extra files... done
dumping search index in English (code: en)... done
dumping object inventory... done
build succeeded.
The HTML pages are in build\html.pdf出力する場合
SphinxでドキュメントをPDF形式で出力する方法の紹介です。PDF出力する方法はいくつかありますが、Sphinx単独では出来ません。一番おススメされていた方法でうまくできたのでLaTeXを利用したPDF出力方法を記載します。LaTexのインストール
まずは、以下のLatex配布サイトにアクセスし「download from a nearby CTAN mirror」をクリックします。アクセス元から最適なダウンロード先が表示されます。
Acquiring TeX Live as an ISO image - TeX Users Group
www.tug.org
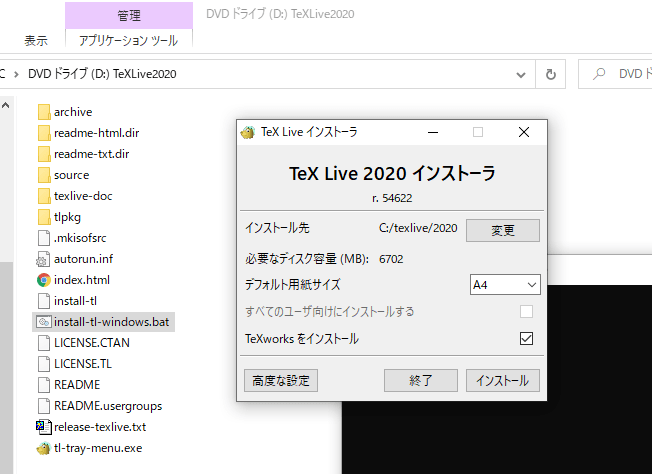 isoファイルのダウンロードが完了したら、isoをダブルクリックで開き、内部の install-tl-windows.bat をダブルクリックで実行するとインストールが進みます。インストールは以上です。
LaTexのバージョン確認
LaTexが正しくインストールされた場合は、ターミナルで以下のコマンドを打つとインストールされたLaTexのバージョンが確認できます。以下のように表示されれば大丈夫です。(myspace) C:\project_dir\doc>platex --version
e-pTeX 3.14159265-p3.8.3-191112-2.6 (utf8.sjis) (TeX Live 2020/W32TeX)
kpathsea version 6.3.2
ptexenc version 1.3.8
Copyright 2020 D.E. Knuth.
There is NO warranty. Redistribution of this software is
covered by the terms of both the e-pTeX copyright and
the Lesser GNU General Public License.
For more information about these matters, see the file
named COPYING and the e-pTeX source.
Primary author of e-pTeX: Peter Breitenlohner.SphinxでのLaTexの設定
PDF出力するための設定としては、conf.pyに以下の記述を追加します。# LaTeX の docclass 設定
latex_docclass = {'manual': 'jsbook'}SphinxでのPDF出力実行
PDF出力はhtmlの際と同様にmakeコマンドを利用します。make latexpdf